Notes
LogicRF™ H102 Pyadi-iio User Manual

LogicRF™ H102 supports PyADI-IIO, version 0.0.13, corresponding to Libiio V0.24.
PyADI-IIO Related Links:
The corresponding API function source code can be found at:
1. Installing Libiio Drivers
a) Windows Environment
For Windows, directly install the libiio driver by using the libiio-0.24.gc4498c2-Windows-setup.exe file.
Download link:
libiio-0.24.gc4498c2-Windows-setup.exe
b) Python Environment Installation
On Windows, it is recommended to use Anaconda (which includes the Spyder IDE). Download link:
Anaconda
c) Setup Procedure
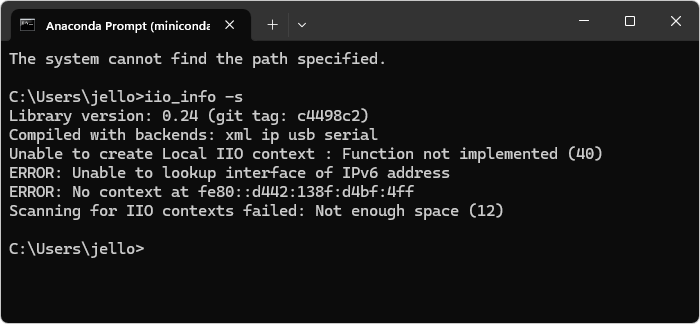
After installation, open the Anaconda Prompt command window and enter iio_info -s. If you see the output as shown below, it indicates that the libiio driver has been installed correctly.

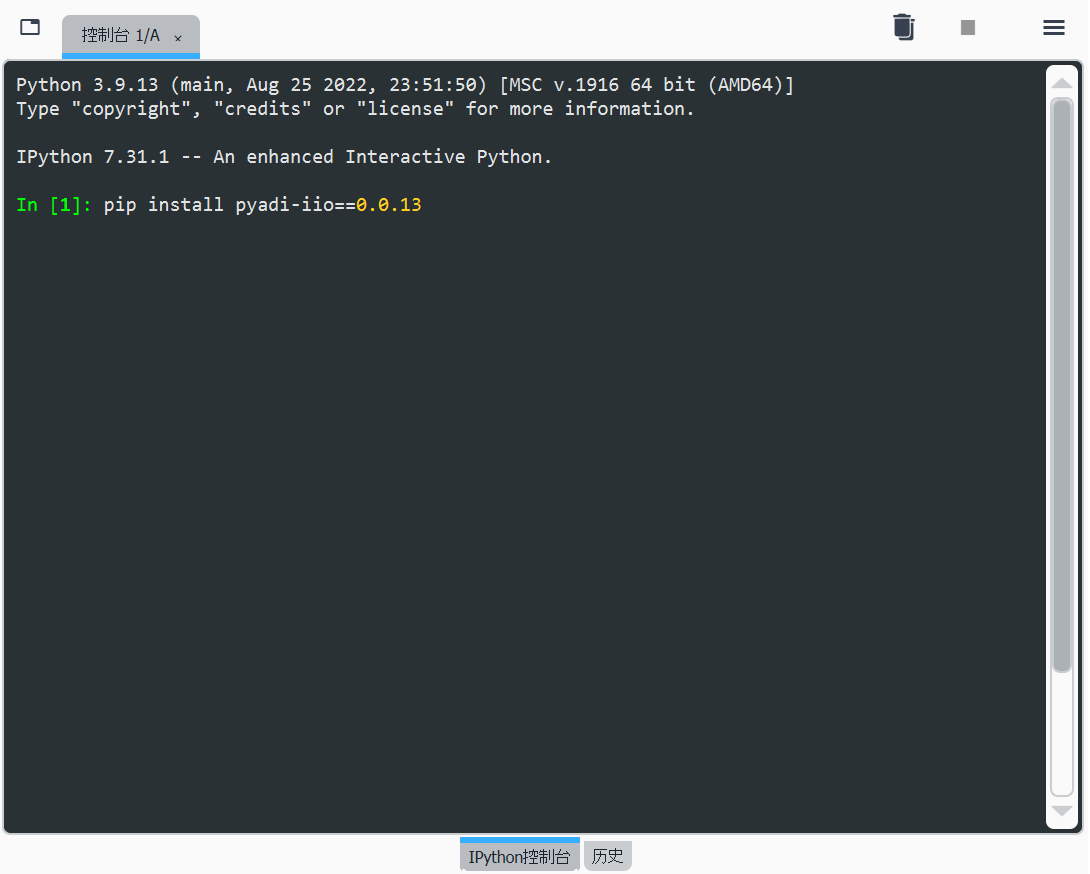
After installing, open Spyder (an IDE included in Anaconda), and in the IPython console, run the following command to install pyadi-iio:
pip install pyadi-iio==0.0.13
Next, create a new .py file, and enter:
import adi
# # Check if pyadi-iio is installed successfully
print("pyadi-iio version:", adi.__version__)
Run the program, and in the bottom-right of the IPython console, you should see the printed information: "pyadi-iio version: 0.0.13". This confirms that pyadi-iio has been successfully installed.

d) Testing H102
Create a new Python file with the following code and execute it to receive data.
# -*- coding: utf-8 -*-
"""
Created on Mon May 24 11:20:18 2023
@author: LogicRF
@email: info@logicrf.com
"""

import adi
import numpy as np
import matplotlib.pyplot as plt
from scipy import signal
import time

# Initialize ADRV9002 device
h102 = adi.adrv9002(uri="ip:10.0.0.48")  # Replace with your device's actual IP address

# Disable TX channels 0 and 1
h102.tx0_en = 0
h102.tx1_en = 0

# Print the current LO frequency settings
print("RX LO Frequency: ", h102.rx0_lo)
print("RX LO Frequency: ", h102.rx1_lo)

# Set RX LO frequencies
h102.rx0_lo = 1650000000  # Set RX1 LO frequency to 1.65 GHz
h102.rx1_lo = 1650000000  # Set RX2 LO frequency to 1.65 GHz

# Alternatively, set RX LO frequency using attribute names
# h102._set_iio_attr("altvoltage0", "RX1_LO_frequency", True, 1450000000)
# h102._set_iio_attr("altvoltage1", "RX2_LO_frequency", True, 1450000000)

# Get the sample rate
fs = int(h102.rx0_sample_rate)
print("rx0_sample_rate: ", fs)

# Get the bandwidth
bw = int(h102.rx0_rf_bandwidth)
print("rx0_rf_bandwidth: ", bw)

# Set the buffer size
h102.rx_buffer_size = 2 ** 10

# Collect data
for r in range(20):
    x = h102.rx2()  # Receive data from RX2 channel
    f, Pxx_den = signal.periodogram(x, fs)
    plt.clf()
    plt.semilogy(f, Pxx_den)
    plt.xlabel("frequency [Hz]")
    plt.ylabel("PSD [V**2/Hz]")
    plt.draw()
    plt.pause(0.05)
    time.sleep(0.1)

# Receive data from RX1 channel
rx_data = h102.rx1()

# Plot received data
plt.figure()
plt.plot(np.real(rx_data), label='Real Part')
plt.plot(np.imag(rx_data), label='Imaginary Part')
plt.legend()
plt.title('Received Data')
plt.xlabel('Sample Index')
plt.ylabel('Amplitude')
plt.show()

# Close the device
del h102
2. Conclusion
This document provides the installation steps and example usage for integrating LogicRF™ H102 with the PyADI-IIO library. With these steps, you should be able to successfully configure, test, and operate the LogicRF™ H102 device within a Python environment.
Previous:logicrfclk Library User Manual
Next:nothing more!